How to Dial In Espresso: Dose, Yield and Time (The Method)
To dial in espresso you adjust three variables until the shot tastes right: dose (grams of dry coffee in the basket), yield (grams of liquid espresso out), and time (seconds the pump runs). Everything else — the machine’s price, the marketing, the café romance — is downstream of that triangle. Get a repeatable dose, fix your yield as a ratio of it, and read the clock and the taste together. That is the whole game, and it is the same loop I run on every bench in my workshop: change one variable, read the result, log it, repeat.
I pull shots every morning before anything else opens up, on a counter where single-boiler machines, a heat-exchanger, and a dual-boiler have all earned their place against the same beans and the same 0.1-gram scale. This guide is the method I actually use, not a tasting-note fantasy. By the end you will know how to set a starting recipe, how to move it when the shot is sour or bitter, and how to read the pour out of a bottomless portafilter so the espresso stops being a lottery.
The only triangle that matters: dose, yield, time
Dialing in feels mystical because beginners change five things at once and can’t tell what helped. Strip it down. There are exactly three numbers you control on a single shot, and they sit in tension with each other:
- Dose — the dry coffee weight in the basket, set on a scale, not by eye. An 18 gram basket wants roughly 18 grams; I treat the printed basket size as a target, not a law (more on that in the dose guide below).
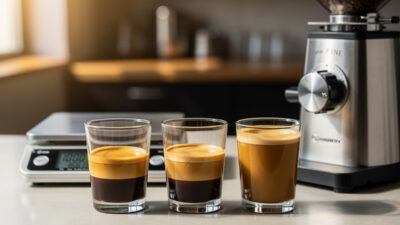
- Yield — the weight of liquid espresso in the cup, measured on a scale under the cup. Crema fools the eye, so you weigh, you don’t watch volume.
- Time — the seconds from when the pump starts to when you stop the shot. It is a read-out, not a target you chase directly.
The relationship that ties them together is the brew ratio: yield divided by dose. A 2:1 ratio means 36 grams out from an 18 gram dose. That single number is the backbone of the whole method, which is why I gave it its own full breakdown. Lock two of the three and the grinder does the rest: with a fixed dose and a fixed yield, the only thing you turn is the grind, and the time tells you whether you went the right way.
Set a starting recipe before you touch the grinder
You can’t dial in toward nothing. Pick a target first, then chase it. For a medium roast in a standard double basket, my default starting recipe is:
- Dose: 18 g
- Yield: 36 g (a 2:1 ratio)
- Time: 25–30 seconds, including pre-infusion
- Temperature: around 93 °C at the group for a medium roast (lower for darker, higher for light)
That is a target, not a verdict. The point of a starting recipe is that it gives the grind adjustment something to move toward. If 36 g pours in 18 seconds, the grind is too coarse and you tighten it. If it crawls out and barely reaches 36 g at 45 seconds, it’s too fine and you open it up. The dose and yield stay put; the grinder is the steering wheel.
The single most common mistake I see is treating time as the thing to hit. Time is a symptom. You don’t grind finer “to get to 28 seconds” — you grind finer to change extraction, and the clock reports back. Two shots can both run 27 seconds and taste completely different if the dose and yield differ.

How to read the shot: sour, bitter, or balanced
Once the numbers are in range, the cup tells you where the extraction landed. This is the part nobody can sell you — it’s pattern recognition you build by tasting against a fixed recipe. The map is simple and it almost never lies:
- Sour, sharp, thin, empty finish → under-extracted. The water didn’t pull enough out. Grind finer (or push the ratio longer, or raise temperature).
- Bitter, harsh, dry, ashy, lingering → over-extracted. The water pulled too much. Grind coarser (or pull the ratio shorter, or drop temperature).
- Sweet, balanced, with a clean finish → you’re home. Log the recipe and move on.
Most people confuse sour and bitter, which is fatal because the fixes are opposite. Sour is an acid sensation up front, like underripe fruit or lemon — it makes you wince. Bitter is a back-of-the-tongue dryness that lingers, like over-steeped tea or burnt toast. When you genuinely can’t tell, it’s usually under-extraction masquerading as “harsh,” because an unbalanced sour shot reads as unpleasant in a way people round up to “bitter.” I wrote dedicated walk-throughs for the two failure modes because they’re where everyone gets stuck: fixing a shot that’s too sour and fixing one that’s too bitter.
The dialing-in loop, step by step
Here is the exact sequence I run on a new bag of beans. It’s deliberately boring — boring is repeatable.
- Set your dose on the scale and keep it identical every shot. Weigh in, weigh the empty basket if you’re being strict, and stop changing it.
- Prep the puck the same way every time. Distribute with a WDT tool, level, tamp consistently. Inconsistent puck prep is the noise that ruins your signal — you’ll think the grind is wrong when really your tamp wandered.
- Pull the shot to your target yield (e.g. 36 g) on the scale, and note the time.
- Taste. Sour → finer. Bitter → coarser. Balanced → stop.
- Change one thing — the grind — and pull again. Make a meaningful adjustment, not a micro-nudge you can’t perceive. On most grinders, move a clear step, taste, then halve the step as you close in.
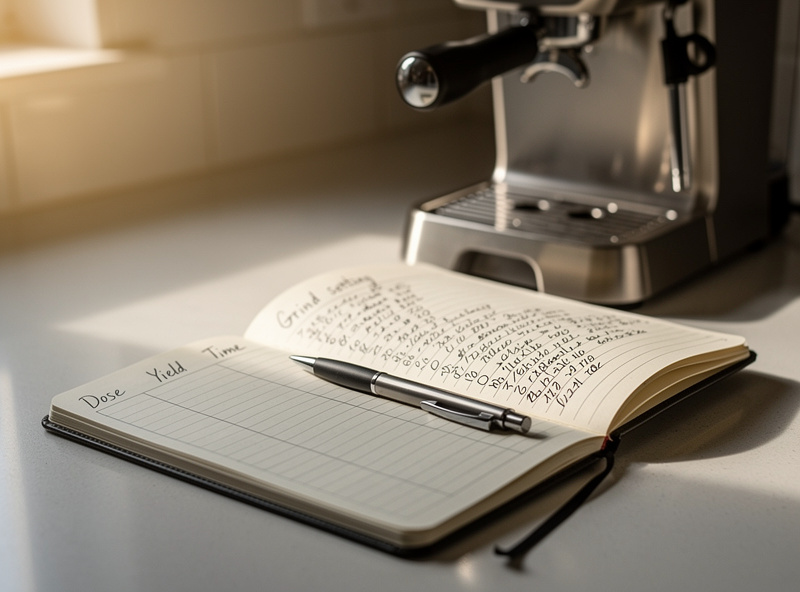
- Log it. Dose, yield, time, grind setting, and a one-word verdict. Next bag, you start from data instead of memory.
That last step is the difference between dialing in and flailing. My shot log is the reason verdicts on this site are repeatable: same beans, same day, same scale, A/B’d back to back. Memory of “the shot I pulled three weeks ago” is worthless; a written line is gold.
Grind size: the lever you actually pull
Of the inputs you can change, grind size moves extraction the most per turn, which is why it’s the default lever once your dose and yield are fixed. Finer grind packs more surface area and more flow resistance, so water spends longer in contact and extracts more — pushing a sour shot toward balance, and a balanced shot toward bitter if you overshoot. Coarser does the reverse.
This is also why the grinder matters more than the machine, and it’s the hill I’ll die on. A 2,000-kronor machine upgrade buys you less than a genuinely good grinder and twenty kronor of dose-and-yield discipline. A machine can only push hot water through whatever puck the grinder built; if the grind is uneven, no amount of PID or pre-infusion saves the shot. Stepless grinders let you make micro-adjustments between “too fast” and “too slow,” which is exactly the resolution dialing-in demands — a stepped grinder that jumps past your sweet spot will frustrate you on light roasts especially.

Comparison: what each adjustment does to the shot
When a shot is off, you have more than one lever. They overlap, but each has a primary effect. This is the cheat-sheet I wish someone had handed me when I started — it tells you what moves what, and the trade-off you accept by reaching for it.
| Adjustment | To fix a SOUR (under-extracted) shot | To fix a BITTER (over-extracted) shot | Trade-off / note |
|---|---|---|---|
| Grind size | Grind finer | Grind coarser | Biggest single lever; change this first. Re-dial after every bag. |
| Brew ratio (yield) | Pull longer (e.g. 1:2.5) | Pull shorter (e.g. 1:1.8) | Longer = more extraction but thinner body; shorter = more intense but can trap sourness. |
| Temperature | Raise (e.g. +1–2 °C) | Lower (e.g. −1–2 °C) | Only meaningful if your machine holds temperature; a PID or surfing routine makes it usable. |
| Dose | (Rarely) dose down slightly | (Rarely) dose up slightly | Changing dose changes headspace and ratio at once — adjust last, in small steps. |
| Puck prep | Improve distribution (kills channeling that fakes sourness) | — | Bad prep mimics both faults; fix prep before chasing grind in circles. |
Notice the columns are mirror images. That’s the whole logic of dialing in: every lever has a “more extraction” direction and a “less extraction” direction, and you push toward the side that fixes the fault you tasted. Start with grind because it has the most authority per turn, and only reach for ratio and temperature once the grind is in the right neighbourhood.
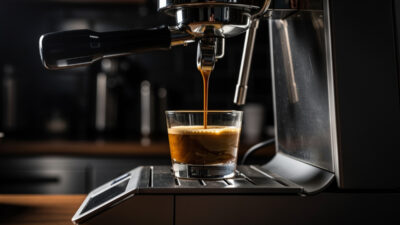
Time, pressure, and what “9 bar” really buys you
Espresso machines target roughly nine bar of brew pressure, and a properly dimensioned shot lands in the 25–30 second window for a 2:1 ratio. But chasing a number on the clock is backwards. A 28-second shot from a channeling puck tastes worse than a 22-second shot from a clean one. Time is feedback on flow rate, and flow rate is mostly a story your grind and puck prep are telling.
If your shots run wildly fast or slow no matter how you grind, the puck — not the recipe — is usually the problem. Water is lazy: it finds the path of least resistance and races through any crack, leaving the rest of the puck under-extracted. That’s channeling, and it produces a shot that’s simultaneously sour (most of the bed) and harsh (the over-run channel), which is maddening to diagnose by taste alone. The honest answer to “how long should my shot take” gets its own breakdown, because the question hides three different sub-questions.
The bottomless portafilter: where channeling has nowhere to hide
A bottomless (naked) portafilter is the single most useful diagnostic tool on my counter, and the cheapest honesty device in espresso. With the spouts gone, you watch the underside of the puck pour directly, and the stream tells you everything your taste buds were guessing at.
- A centred, even, tapering stream that comes together into a single “mouse tail” = a well-prepped puck extracting evenly. This is the target.
- Jets, sprays, or sudden side-streams = channeling. Water broke through a weak spot. Fix your distribution and tamp, not your grind.
- A stream that blonds (goes pale) very early = you’re over-running the puck; consider a shorter ratio.
The reason I demonstrate every technique claim against a bottomless is simple: it can’t be faked. You either prepped the puck well or the pour exposes you. I put together a full read-the-pour guide on interpreting what the bottomless shows you, because once you can read it, you stop changing the grind to fix problems that were really prep problems.
Dose, yield by drink, and where this all goes next
Two practical extensions of the core method are worth their own attention. First, the dose: an 18 gram basket doesn’t mandate exactly 18 grams, and the small window of dose you can run in a given basket changes headspace and how the puck behaves — I cover the right dose for an 18g basket in detail. Second, the yield: a ristretto, a straight double, and the base for a long milk drink are different ratios on purpose, and matching yield to the drink you’re building is what separates a thought-through café menu at home from pulling the same 36 grams into everything.
None of this requires expensive gear. It requires a scale, a timer, a grinder you can actually adjust, and the discipline to change one variable at a time and write down what happened. That discipline is the entire moat. The espresso cult sells mystique; the bench sells repeatability. Dialing in is just process control you get to drink.
Temperature: the fourth variable, once the first three are stable
Dose, yield, and time are the triangle you fight with daily. Temperature is the slower, quieter lever you reach for once those are dialed and the shot is almost there — a hair sour or a touch harsh that grind alone won’t resolve cleanly. Higher brew temperature extracts more (helps a stubbornly sour light roast); lower extracts less (tames a darker roast that keeps turning bitter).
The catch is that temperature only becomes a usable lever if your machine actually holds it. A PID-controlled machine lets you set a number and trust it shot to shot — that repeatability is most of what you’re paying for in a dual boiler, and it’s why I keep a Breville Dual Boiler on the counter as the value reference for temperature stability per krona. A single-boiler machine without PID drifts, so you “temperature surf”: run a cooling flush or wait a fixed number of seconds after the heating element cycles, so the group is at a consistent point every time. On my OPV-modded Classic that surfing routine lives in muscle memory; without it, the same recipe lands sour one shot and balanced the next, and you’ll blame the grind for a temperature problem.
So the order of operations matters: stabilise dose and prep, dial the grind against a fixed yield, and only then treat temperature as the fine-tune. Reaching for temperature before the grind is in the right neighbourhood just adds a variable to an equation you haven’t solved yet.
Puck prep: the silent variable that fakes every other fault
I keep coming back to puck prep because it’s the noise floor of the whole process. You can have a perfect dose, a perfect yield, a perfect grind setting — and still pull a sour, channeling mess because the grounds went into the basket as clumps with a low spot the water exploited. Worse, bad prep imitates a grind problem: the shot runs fast and sour, you grind finer to compensate, and now you’ve buried a prep fault under a too-fine grind that will turn bitter the moment your distribution improves.
The fix is a repeatable routine, run identically every shot: break up clumps with a WDT tool (a few needles stirred gently through the grounds), level the bed, and tamp with consistent pressure — level matters far more than how hard you press. The goal isn’t force; it’s an even, gap-free puck so water meets uniform resistance everywhere. When prep is consistent, the grind becomes the honest signal it’s supposed to be, and dialing in actually converges instead of chasing its own tail. This is exactly why I prep against a bottomless portafilter: it shows me, every single shot, whether the puck was even before I trust any taste verdict.
Water: the invisible ingredient that ends a dial-in mystery
If your shots taste flat and dull no matter how cleanly you dial, suspect the water before you suspect yourself. Espresso is about 90% water, and its mineral content changes how flavour compounds extract — too soft and the cup goes hollow, too hard and it mutes the aromatics (and scales up your boiler besides). I treat water as a taste-and-machine-protection question, never a health one: a sensible hardness and alkalinity makes a coffee taste like itself, and protects the machine from scale that eventually changes how it heats. You don’t need a laboratory; you need to know that if the dial-in never quite “clicks” across multiple good beans, the water is a variable hiding in plain sight. Get it into a reasonable range once and it stops being a variable — which is the whole goal of everything on this page.
Re-dialing: why the recipe is never “done”
Here’s the part beginners resent and experts accept: you re-dial constantly. A new bag of the same coffee from the same roaster will often want a different grind than the last, because roast date, freshness, and even ambient humidity shift how the beans behave. Fresh beans degas more CO2 and resist water differently; a bag two weeks past roast pours differently than the same bag at four days. None of this is a problem — it’s just the system telling you to adjust, which takes one or two shots when you have a logged starting point and your dose and yield are already fixed.
This is why the log earns its place yet again. When a new bag fights you, you don’t start from zero — you start from “last medium roast wanted grind setting X, this one is fresher so try a touch coarser,” pull one shot, taste, and converge. Dialing in stops being a 45-minute ordeal and becomes a 90-second check. The discipline that felt tedious on day one is exactly what makes espresso fast and boring later — and boring, repeatable shots are the entire point.
The tools that make dialing in repeatable
You can dial in with almost nothing, but a few inexpensive tools remove the noise that makes beginners chase their tails. None of these are the machine — they’re the instrumentation around it, and they punch far above their price. A 0.1-gram espresso scale that fits on the drip tray is the first thing I’d buy — you can’t control a dose or a yield you aren’t measuring. A WDT distribution tool kills the clumping that causes channeling, and a bottomless portafilter in your basket size turns every shot into a visible diagnostic. That’s the dial-in kit; everything past it is refinement.
As an Amazon Associate I earn from qualifying purchases. Links above are to gear I use on my own counter; they cost you nothing extra.
Where to take the method next
This page is the spine; the rest of the cluster is each joint in detail. If you read nothing else, read the ratio piece — it’s the one number that makes the other variables make sense. Here’s the order I’d send a friend through:
- Start with the number: espresso ratio explained — why 1:2 is the default and when to break it.
- Then get the dose right: the right dose for an 18g basket — how much room you actually have, and what changing it does to headspace.
- Match output to the cup: espresso yield by drink type — ristretto, straight double, and milk-drink bases are different ratios on purpose.
- Read the clock honestly: how long an espresso shot should take — why time is feedback, not a target.
- When it’s sour: fixing an espresso shot that’s too sour — the under-extraction playbook.
- When it’s bitter: fixing an espresso shot that’s too bitter — the over-extraction playbook.
- See what’s really happening: reading an espresso pour from a bottomless portafilter — the honesty device that ends prep-vs-grind guessing.
Work through those and you’ll own the whole loop: a solid ratio, a measured dose, a read on the time, and the taste vocabulary to know whether you’re under or over — confirmed by what the bottomless pour shows you.
Frequently asked questions
What does it mean to dial in espresso?
Dialing in means adjusting your grind, dose, and yield until a shot extracts in balance — not sour, not bitter — for a specific coffee. Because every bag of beans behaves differently, you re-dial whenever you change beans, fixing your dose and target yield and turning the grind until the time and taste land right.
What is a good starting recipe for espresso?
For a medium roast in a standard double basket, start at 18 grams in, 36 grams out (a 2:1 ratio), aiming for 25 to 30 seconds at around 93 degrees Celsius. Treat it as a target to chase with the grinder, not a verdict — adjust the grind until the shot tastes balanced.
Should I change grind or time to fix a shot?
Change the grind. Time is a read-out, not a control. Grind finer for a sour, under-extracted shot and coarser for a bitter, over-extracted one; the shot time will move on its own as a result. Chasing a target time directly is the most common beginner mistake.
Why does my espresso taste different every time?
Almost always inconsistent puck prep or an unmeasured dose. If you don’t weigh your dose and yield on a scale and distribute the grounds the same way each shot, you’re changing several variables at once and can’t isolate what went wrong. Fix the dose, fix the prep, then dial the grind.
Do I really need a scale to dial in espresso?
Yes — it’s the cheapest, highest-impact tool in espresso. You cannot control a dose or a yield you aren’t measuring, and crema makes judging volume by eye unreliable. A 0.1-gram scale under the cup turns a guessing game into a repeatable process.
Does the grinder really matter more than the machine?
For dialing in, yes. The machine pushes hot water through whatever puck the grinder builds; if the grind is uneven or you can’t adjust it finely, no amount of PID or pre-infusion fixes the shot. A grinder you can adjust precisely buys more cup quality per krona than an equivalent machine upgrade.
Keep reading — Complete Spoke List
Full spoke list of the Espresso Dialing-In cluster:
- “Reading a Bottomless Portafilter Pour: What Your Shot Is Telling You”
- “Espresso Yield by Drink Type: Match the Shot to the Cup”
- “How Long Should an Espresso Shot Take? (Time Is a Read-Out)”
- “The Right Dose for an 18g Basket: It Is All About Headspace”
- “Espresso Shot Too Bitter? The Fix
- “Espresso Ratio Explained: Why 1:2 Is Your Default (and When to Break It)”
- “Espresso Shot Too Sour? The Fix
More From This Site
Other guides across espresso dialing-in and the rest of the Espressospecs library:
- “Renting vs Buying an Espresso Machine: The Honest Math”
- “Espresso Machine Features That Actually Matter”
- “Espresso Machine for a Small Kitchen: How to Choose”
- “Single Boiler vs Heat Exchanger Explained”
- “Best Espresso Machine Under $500: Honest Picks”
- “Used Espresso Machine Buying Checklist”
- “Is the Gaggia Classic Pro Worth It? An Honest Verdict”
- “First Espresso Machine: A Beginner Buying Guide”
- “Stepless vs Stepped Grinder Adjustment for Espresso”
- “Using a Hand Grinder for Espresso Daily: The Reality”
- “Coffee Grinder Retention Explained (and How to Beat It)”
- “Flat vs Conical Burrs: What You Actually Taste”
- “Is a Single-Dose Grinder Worth It? An Honest Take”
- “Best Espresso Grinder Under $300: What Actually Matters”
- “The Espresso Grinder Guide: Why It Outranks Your Machine”
- “When to Replace Your Coffee Grinder Burrs”
- “Reading a Bottomless Portafilter Pour: What Your Shot Is Telling You”
- “Espresso Yield by Drink Type: Match the Shot to the Cup”
- “How Long Should an Espresso Shot Take? (Time Is a Read-Out)”
- “The Right Dose for an 18g Basket: It Is All About Headspace”
- “Espresso Shot Too Bitter? The Fix
- “Espresso Ratio Explained: Why 1:2 Is Your Default (and When to Break It)”
- “Espresso Shot Too Sour? The Fix