Espresso Extraction Science: The Complete Guide
Espresso extraction is the controlled dissolving of soluble coffee compounds into water under pressure, measured two ways: extraction yield (the percentage of the dry grounds that ended up in your cup, target 18–22%) and TDS (how concentrated the resulting liquid is, typically 8–12% for espresso). Everything else — grind, dose, temperature, pressure, time — is just a lever that moves those two numbers.
I run this site from a counter where machines and grinders are judged by a shot log, not by café romance, and extraction is the one topic that ties every verdict together. When I say a grinder “outranks the machine” or that a $20 dose-and-yield discipline beats a $2,000 upgrade, this is the science underneath that claim. This guide is the map. Each section answers one question completely, then points to the spoke article where I go deeper — because extraction science is a system, and you dial it as a system.
What Extraction Actually Means in the Cup
Extraction is the migration of coffee solubles — acids, sugars, lipids, melanoidins, and bitter compounds — out of the ground bean and into hot water. In espresso, roughly 18–22% of the dry grounds’ mass dissolves; the rest stays in the puck. Pull that number too low and the cup is sour and thin; too high and it turns harsh and hollow.
The order of extraction matters as much as the total. Acids and fruity compounds come out first, sugars and sweetness in the middle, and the dry, bitter, woody compounds last. A balanced shot captures the first two waves and stops before the third dominates. That is the entire game: not “more extraction” or “less,” but the right compounds in the right proportion. On my counter I read that balance by taste first and confirm it with numbers when a verdict needs them. If you want the practical control loop rather than the theory, my how to dial in espresso guide walks the dose-yield-time triangle step by step.
The Two Numbers: TDS and Extraction Yield
TDS and extraction yield are different measurements people constantly confuse. TDS is strength — the mass percentage of dissolved solids in the liquid you drink, read directly by a refractometer (espresso lands around 8–12%). Extraction yield is efficiency — how much of the dry coffee you actually got out, calculated from TDS, beverage mass, and dose.
You can have high strength and low yield at the same time: a ristretto is concentrated (high TDS) but under-extracted (low yield) because you stopped early. That distinction is why a refractometer changed how I argue about shots — it separates “tastes intense” from “tastes complete.” I break the strength side down in TDS in espresso explained and the efficiency side in extraction yield percentage explained. Read both and the marketing fog around “perfect shots” clears fast.
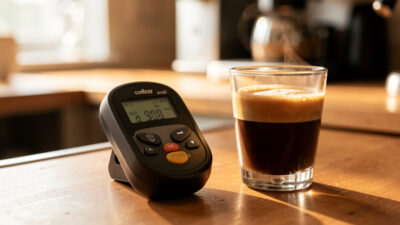
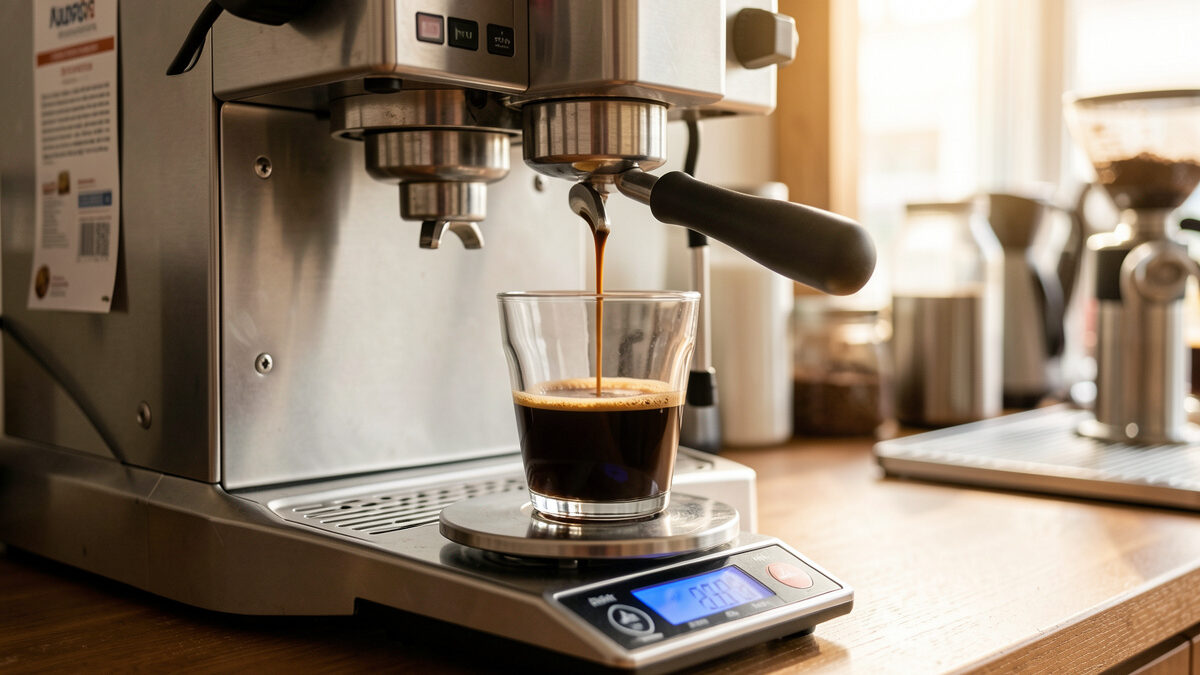
The formula that ties them together is simple bookkeeping: Extraction Yield % = (Beverage mass × TDS) ÷ Dry dose. Pull 18 grams in, get 36 grams of espresso out at 10% TDS, and you extracted 3.6 grams of coffee — exactly 20% of your dose. No mysticism, just a scale and a refractometer doing what my eyes can’t.
The Levers That Move Extraction
Five variables control where your extraction lands: grind size, dose, water temperature, pressure, and contact time. Change one and you change the yield. The discipline is changing one at a time and logging the result — the same single-variable loop I use trimming a 3D printer’s first layer.
Grind is the biggest lever and the reason I tell everyone the grinder matters more than the machine. Finer grind means more surface area and slower flow, which raises extraction; coarser does the opposite. Burr geometry changes the particle distribution behind that, which is why I cover flat vs conical burrs and the whole case in the espresso grinder guide. Dose sets the bed depth and resistance; I size it to the basket’s headspace, covered in my 18g basket dose piece. Temperature raises solubility — hotter water extracts more, which is exactly why light roasts fight you. Pressure and time round it out, and both are read at the spout, not guessed.
Even Extraction: Why Channeling Wrecks the Number
An extraction yield is an average, and averages lie when water flows unevenly through the puck. Channeling — water punching a low-resistance path through the bed — over-extracts the channel and under-extracts everything around it. The refractometer might read a respectable 20%, but the cup tastes both sour and bitter because half the puck was each.
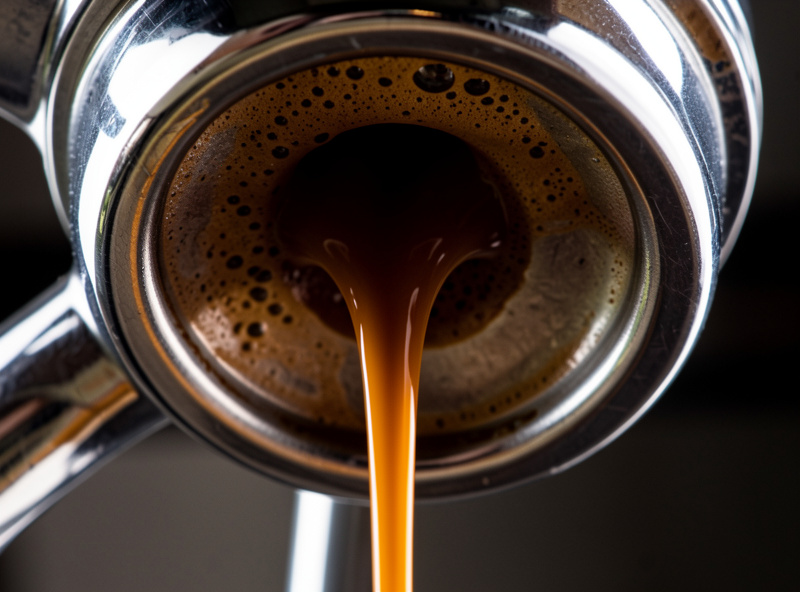
This is why I run a bottomless portafilter as the honesty device: channeling has nowhere to hide when you can watch the bottom of the basket. A shot that sprays, blonds early on one side, or pours two ropes is telling you the puck failed, not the recipe. The fix lives upstream in puck prep — WDT, distribution, an even tamp — not in chasing the yield number. I explain the diagnosis in channeling in espresso, what it is, and the read at the spout in reading a bottomless portafilter pour. Until your extraction is even, the average yield is a number you can’t trust.
Water: The Invisible Half of Extraction
Water is roughly 90% of what’s in the cup and it is an active reagent, not a neutral solvent. Its mineral content — mainly hardness (calcium and magnesium) and alkalinity (bicarbonate) — changes how aggressively it pulls compounds out of the coffee. Too soft and flat-tasting, too hard and the shot is dull and chalky while your boiler scales up.
Magnesium in particular boosts extraction of the bright, fruity acids; bicarbonate buffers acidity and can flatten a delicate roast. This is the lever most home baristas never touch because they can’t see it. I keep the framing strictly to taste and machine protection — never health — and the targets live in water hardness and espresso extraction and the practical sourcing call in best water for espresso machines. If your shots are inconsistent across the same bag and recipe, water is the variable hiding in plain sight, and scale is the slow tax — see scale damage warning signs.
Temperature, Pressure, and Pre-Infusion
Once grind and water are handled, temperature and pressure are the fine controls. Water temperature directly sets solubility — a few degrees up extracts more sweetness from a stubborn bean and tips a dark roast into ash. Stable temperature is the entire argument for PID control, and it is where I say money lands second (after the grinder), covered in single boiler vs heat exchanger.
Pressure shapes how the water attacks the puck. A standard pump pushes nine bar, but the start of the shot matters more than the peak. Pre-infusion — wetting the puck at low pressure before ramping up — lets the bed settle and saturate evenly, which suppresses channeling and raises extraction without grinding finer. Pressure profiling takes that further, varying pressure across the shot to favour different compounds. I cover what pre-infusion actually does in pre-infusion in espresso explained and the deeper control in pressure profiling espresso explained. Both are extraction tools, not gadgets.
Roast Level Changes the Whole Equation
A bean’s roast level decides how easily it gives up its solubles. Dark roasts are porous and brittle — they extract fast and reach 20% yield with modest effort. Light roasts are dense and under-developed by espresso standards; they resist extraction and routinely land sour and under-extracted on the same recipe that nailed a dark roast.
Coming from Nordic roasting culture, light-roast espresso is my home turf, and it is the clearest example of extraction science in action: you fight density with finer grind, higher temperature, longer ratio, and gentle pre-infusion to claw the yield up to where the sweetness lives. The full playbook is in light roast extraction challenges. If you’ve ever wondered why a café’s light single origin sang and yours tasted like lemon water, the answer is extraction yield, not the bean.
The Single-Variable Method: How I Dial Extraction
Extraction science is useless without a method to apply it, and mine is borrowed from every other bench I run: change one variable, read the result, log it, repeat. The fastest way to never improve a shot is to grind finer, bump the temperature, and add pre-infusion all at once — now you’ve moved three levers and learned nothing about which one mattered.
My loop is fixed. I lock dose and ratio first (say 18 grams in, 36 out, the 1:2 default I defend in espresso ratio explained), then I move grind only until the shot time and taste settle into the target window. Once grind is dialed, I’ll touch temperature for a stubborn bean and pre-infusion for an uneven puck — but never before grind is locked. Each pull goes in the log with grind setting, time, yield, and a one-line taste note. After a bag or two the pattern is obvious, and the next bag of the same coffee starts three settings from done instead of from scratch. This is the whole reason I distrust “God shot” stories: a shot you can’t reproduce tomorrow is luck, not skill, and luck doesn’t survive a shot log.
Grind Distribution and the Extraction Ceiling
Grind size sets the average, but grind distribution sets your ceiling. A grinder doesn’t produce one particle size — it produces a spread, and the shape of that spread decides how evenly the whole bed can extract. Lots of fines (dust) over-extract and clog flow; lots of boulders (coarse chunks) never give up their solubles at all, dragging your yield down no matter the recipe.
This is the mechanism behind “the grinder outranks the machine.” A tighter particle distribution means the fast-extracting and slow-extracting fractions are closer together, so you can push the average yield up toward 21–22% before any part of the puck turns bitter. A cheap grinder with a wide spread caps you in the under-extracted, sour zone because pushing finer just adds fines and channeling. Burr geometry drives this — I cover what you actually taste in flat vs conical burrs and the full case in the espresso grinder guide. When people ask why their expensive machine still pulls mediocre shots, distribution is usually the answer, and no PID or pressure profile fixes a bad particle spread.
Time and Flow Rate: Reading the Shot
Shot time isn’t a target you hit — it’s a read-out that tells you whether your grind matched the dose. A 1:2 shot that takes 25–32 seconds is usually in the extraction window; one that gushes out in 15 seconds is coarse and under-extracted, and one that takes 50 seconds is choked and over-extracting the surface while channeling underneath.
But the clock is the dumb instrument. Flow rate — how the stream behaves moment to moment — is the smart one. A shot that starts slow, builds to a steady honey-thick rope, and blonds gently at the end is extracting evenly. A shot that sprints, blonds early, or pours pale and fast is telling you the puck failed before the timer ever mattered. I explain the timing logic in how long an espresso shot should take, but the honest read comes from watching the pour on a bottomless portafilter, not from chasing a number on the timer. Time confirms; it doesn’t command.
The Common Extraction Mistakes I See
Most stalled home setups fail the same handful of ways, and none of them are the machine. The biggest is chasing strength when the problem is yield — pulling shorter and shorter ristrettos because “stronger” feels like progress, while the cup gets more sour because you’re extracting less, not more. Concentration and completeness are different axes.
The second is moving multiple variables per pull, so no shot teaches anything. The third is ignoring puck prep and blaming the recipe when the real fault is channeling — the fix for a sour-and-bitter cup is a WDT tool and a level tamp, not a temperature change. The fourth is never touching water, leaving the single biggest invisible variable on default. And the fifth is buying the machine before the grinder, then wondering why a dual boiler still pulls flat shots through a wide particle spread. Fix those five in order and the cup improves before you spend another krona. The diagnostic shortcuts for the two taste extremes live in espresso shot too sour and espresso shot too bitter.
How the Numbers Map to Taste
The reason extraction science is worth learning is that the numbers correlate with flavour in a predictable, repeatable way. This is the cheat sheet I keep in my shot log — read the cup, place it on the table, and you know which lever to move next.
| Extraction Yield | TDS (typical) | What the Cup Tastes Like | Most Likely Fix |
|---|---|---|---|
| Under 18% | Often high (ristretto-like) | Sour, salty, sharp, thin finish | Grind finer, raise temp, longer ratio |
| 18–20% | 9–11% | Bright, acidic, defined — favours light roasts | Hold; nudge finer for more body |
| 20–22% | 9–11% | Balanced, sweet, full — the target window | Nothing — log it and repeat |
| Over 22% | Often low (long shot) | Bitter, hollow, dry, astringent finish | Grind coarser, lower temp, shorter ratio |
| Any yield, uneven | Misleadingly normal | Sour AND bitter at once | Fix puck prep — you are channeling |
Notice the last row. A respectable average yield with a bad mouthfeel is the channeling signature, and no recipe change fixes it — only better distribution does. That single insight saves more bad shots than any equipment upgrade, which is the through-line of everything I publish here: discipline beats spend.
Do You Need a Refractometer to Use This?
No — and this is where I part ways with the gadget-first crowd. Your palate is the primary instrument; the dose-yield-time triangle and a 0.1-gram scale get you to a great shot without ever reading TDS. A refractometer is a verification tool for when a verdict needs numbers — comparing two grinders on the same bean, or proving a water change actually moved extraction.
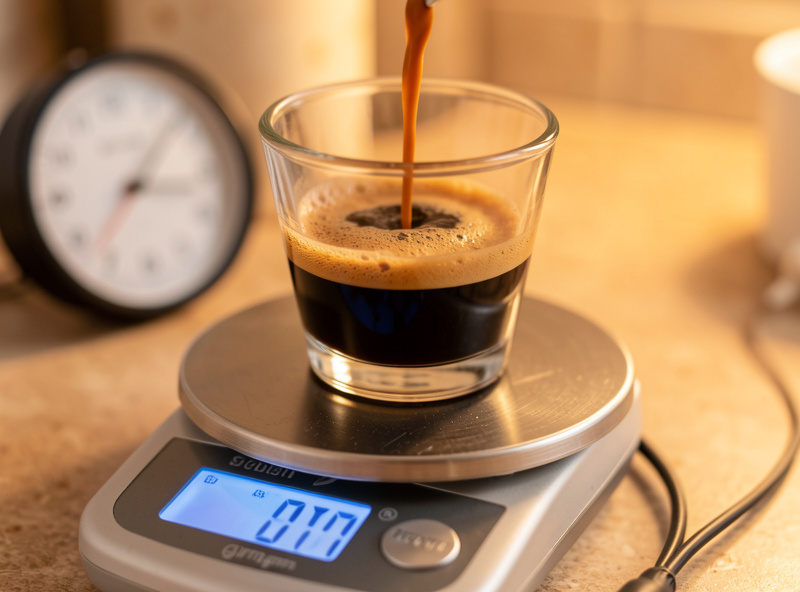
If you log shots and want to close the loop with data, a refractometer earns its place; if you’re still chasing repeatability, spend on the grinder and the scale first. As an Amazon Associate I earn from qualifying purchases. When you’re ready to measure, a dedicated coffee TDS refractometer and a 0.1g Bluetooth espresso scale are the two instruments that turn guessing into a logged, repeatable process. The scale matters far more than the refractometer for most people — measure dose and yield first, strength second.
The Value Map: Where Money Actually Reaches the Cup
Because extraction is a system, you can rank upgrades by how much they move the yield rather than how much they cost. This is the map I keep arguing for, and it almost never matches the order people spend in. The first 1,000 kr belongs in the grinder, every time — a tighter particle distribution raises your extraction ceiling and is the difference between capped-sour and balanced-sweet. Nothing downstream undoes a wide grind spread.
The second band of money buys temperature stability — PID control or a machine class that holds temperature shot to shot, because a wandering brew temperature scatters your extraction yield across pulls and ruins the repeatability the whole shot-log method depends on. That’s the real argument in single boiler vs heat exchanger and the reason I rate the value-dual so highly. Only after those two does the rest matter: pre-infusion and pressure profiling are genuine extraction tools but they’re refinements on an already-even shot, not rescues for a bad one. A bottomless portafilter and a WDT tool cost almost nothing and improve evenness more than most machine upgrades. And water — nearly free to fix — sits oddly far down most people’s lists despite being 90% of the cup. Spend in that order and every krona lands on the tongue; spend out of order and you’re decorating the counter. Maintenance protects all of it, which is why I treat machine maintenance and descaling as part of extraction, not a chore separate from it.
Frequently Asked Questions
What is the ideal extraction yield for espresso?
Most balanced espresso lands between 18% and 22% extraction yield, with 20-22% being the sweet spot for body and sweetness. Light roasts often taste best toward the higher end; dark roasts can turn bitter past 21%. The number matters less than whether the cup tastes balanced.
What is the difference between TDS and extraction yield?
TDS measures strength, the percentage of dissolved solids in the liquid you drink (8-12% for espresso). Extraction yield measures efficiency, how much of the dry grounds dissolved (18-22%). A shot can be strong but under-extracted, like a ristretto, so the two numbers describe different things.
What is the single biggest factor in espresso extraction?
Grind size is the largest lever because it changes surface area and flow resistance more than any other variable. That is why the grinder matters more than the machine. Burr quality and consistency determine how evenly the whole bed extracts, which sets your ceiling for a balanced shot.
Can I improve extraction without buying anything?
Yes. Better puck prep, distributing the grounds with a WDT tool and tamping level, raises and evens out extraction for free. Adjusting dose, grind, and ratio costs nothing but attention. A 0.1-gram scale you may already own does more for repeatability than most equipment upgrades.
Why does my shot taste sour and bitter at the same time?
That combination almost always means channeling, where water flowed unevenly through the puck, over-extracting one part and under-extracting another. The average extraction looks normal but the cup tastes like both extremes. Fix the distribution and tamp, not the recipe, and pull on a bottomless portafilter to see it.
Does water really change espresso extraction?
Significantly. Magnesium and calcium in the water actively pull compounds out of the coffee, while bicarbonate buffers acidity. Water that is too soft tastes flat and too hard tastes dull while scaling your machine. Mineral content is one of the most overlooked variables in a home setup.
Related Guides in This Cluster
Extraction science is a system, and each of these spokes takes one lever apart in detail:
- TDS in Espresso Explained — what strength actually measures and how to read it.
- Extraction Yield Percentage Explained — the efficiency number and the formula behind it.
- Channeling in Espresso: What It Is — why uneven flow ruins the average.
- Water Hardness and Espresso Extraction — the invisible reagent in the cup.
- Light Roast Extraction Challenges — fighting dense beans for yield.
- Pre-Infusion in Espresso Explained — the low-pressure saturation that evens the shot.
- Pressure Profiling Espresso Explained — varying pressure to shape extraction.