Microfoam Technique on a Single Boiler

You can pull café-grade microfoam on a single-boiler machine — you just have to respect its smaller steam budget. The trick is steaming a smaller volume (around 120–150ml), working fast in the short steam window, and front-loading your air in the first two seconds before the boiler pressure starts to sag. Done right, a single boiler textures milk every bit as glossy as a dual boiler.
My reference single boiler is an OPV-modded Gaggia Classic Pro, run head-to-head against a Rancilio Silvia and a Breville Dual Boiler on the same counter, against the same carton of milk. The dual boiler is genuinely easier — nobody sensible argues otherwise — but the gap in the cup is far smaller than people think, and it is entirely a matter of technique. This is the single-boiler microfoam method that closes most of that gap.
Why a single boiler is harder for milk
A single boiler has one heating vessel that either brews at ~93°C or steams at ~130°C, never both at once, and its steam output is lower and shorter-lived than a dedicated steam boiler. In practice that means a smaller, weaker steam stream that you cannot lean on indefinitely — the pressure builds, peaks, and then tails off as the boiler gives up its stored energy. You are working against a clock the dual-boiler owner never sees.
The honest consequence is that you get one good steaming window per shot, and it is shorter than you would like. You cannot dawdle, you cannot re-steam a botched pitcher, and you cannot texture a 12oz latte’s worth of milk in one go without the steam dying mid-pour. None of that stops you making excellent microfoam — it just means your method has to be tighter and your milk volume smaller. Everything below is built around that constraint, the same way I build a dial-in routine around the variables I actually control.
Wait for the steam, properly
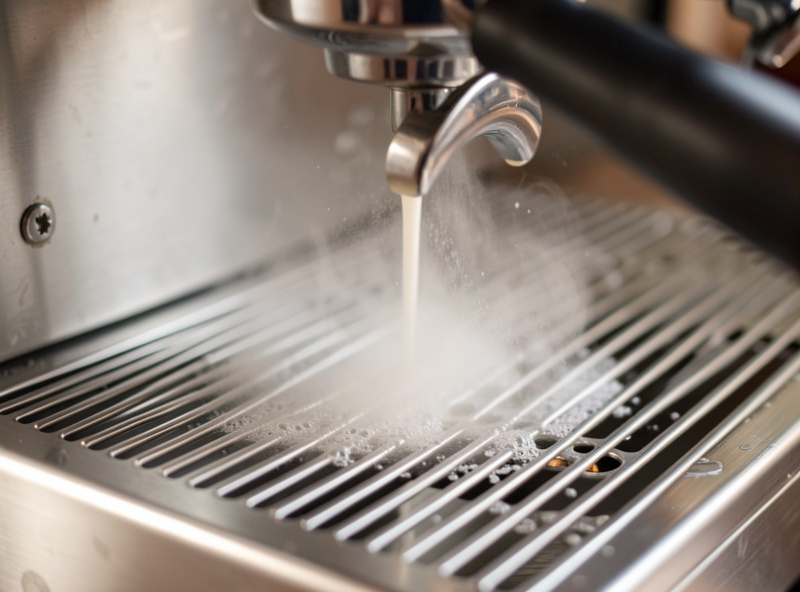
On a single boiler the most common milk mistake happens before you even touch the pitcher: steaming too early. After your shot the boiler has to climb from brew temperature to steam temperature, and the ready light comes on a few seconds before the boiler is genuinely at full steam pressure. Give it an extra ten to fifteen seconds past the light, then purge a burst to confirm you are getting dry, forceful steam rather than a sputter of water.
That purge does two jobs: it clears condensed water sitting in the wand so your first contact with the milk is dry steam, and it tells you honestly whether the boiler is ready. If the purge spits and hisses weakly, wait. If it drives out a hard, dry plume, go immediately — you are now on the clock and every second of full pressure counts. On my Classic I treat the purge as the starting gun, not a formality.
Steam a smaller volume than you think
The single biggest fix for single-boiler milk is using less of it. Steam roughly 120–150ml — enough for one flat white or a small cappuccino — in a 350ml pitcher, and your modest steam stream has an easy job heating and texturing that small mass before it runs out of pressure. Try to do a full latte’s worth and the steam dies before the milk is ready, leaving you cold, flat, and under-textured.
This is also why single-boiler owners should plan to make drinks one at a time. If two people want flat whites, steam one, pour it, let the boiler recover for thirty seconds, and steam the second fresh. It feels slower than a café, but it gives each drink full steam pressure and consistent microfoam, which beats two mediocre lukewarm pours every time. A correctly sized pitcher makes this far easier — I cover the exact sizes in the pitcher size guide.
Front-load your air
Because your steam pressure tails off, you must add all your air in the first two to three seconds while the pressure is highest. Submerge the tip just below the surface, open the steam fully, and let it stretch with a soft tearing sound immediately — then drop the tip deeper to stop aerating and spend the rest of the (short) window building your whirlpool. On a dual boiler you can be lazy about when you aerate; on a single boiler the timing is everything.
Get this backwards — spinning first and trying to add air at the end — and you run out of steam before the foam is built, ending with hot milk and no microfoam. The discipline is: air first while strong, texture second while it lasts, cut off the moment the milk hits temperature. Because your volume is small, that whole sequence takes only six to ten seconds, which is exactly why the small volume matters — it fits inside the steam window. The principle behind it — the microfoam itself — is universal, and the complete milk steaming guide covers what good microfoam looks like in detail.
Build the whirlpool against the wall
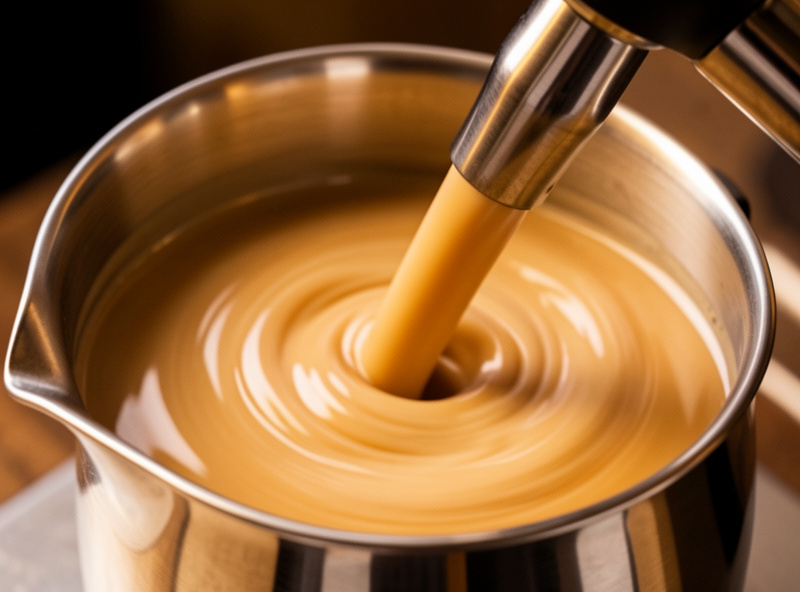
After the air is in, angle the pitcher so the tip sits off-centre and just under the surface, driving the milk into a fast whirlpool that spins around the wall of the jug. This whirlpool is what folds the air you just added down into the body of the milk, turning a foamy top layer into integrated microfoam. On a single boiler you have less time to do this, so a tighter, faster whirlpool matters more — position the tip aggressively to get the milk moving immediately.
You are looking for a smooth rolling vortex with a glossy surface and no big visible bubbles. If the milk just boils flatly in place, the tip is too central or too deep — move it toward the wall and nearer the surface until it spins. Keep that spin going right up to your temperature cut-off. The whirlpool does not stop being important just because your machine is cheaper; if anything it matters more, because you have fewer seconds to get it right.
Cut off by feel, fast
Stop steaming at 55–60°C, which on a single boiler comes up fast because of the small milk volume — cut off the moment the base of the pitcher becomes too hot to hold comfortably for a full second. Because your mass of milk is small, it heats quickly, and the difference between perfect and scalded can be two seconds. Err on the side of stopping early; you can always serve milk a touch cooler, but you cannot un-scald it.
A thermometer helps enormously while you learn this, precisely because the small-volume single-boiler steam moves fast and gives you little margin. Clip a probe to the side of the pitcher and watch for 55°C the first dozen times, and your hand will calibrate quickly. The per-drink temperature targets — cortado and flat white run cooler, a hot latte slightly warmer — are laid out in the milk temperature guide.
Then clean the wand immediately
Purge and wipe the wand the instant you finish, every time. This matters even more on a single boiler, because a partially blocked steam tip robs you of the steam power you already have little of — on a dual boiler you might not notice a slightly clogged tip, but on a Classic it is the difference between texturing your milk and not. Thirty seconds of maintenance protects the one thing you cannot afford to lose.
The routine is the same one I run on every machine: purge a burst to clear milk from inside the wand, wipe it down with a damp cloth, and once a week soak the detached tip to clear the holes. Skip it and you will slowly convince yourself your machine has “gone weak” when really the tip is half-clogged with baked milk. The full procedure is in the steam wand cleaning guide.
Single boiler vs dual boiler for milk, honestly
Here is the side-by-side from my own counter, so you know exactly what you are and are not giving up by steaming on a single boiler. The cup difference is real but small; the workflow difference is large.
| Factor | Single boiler | Dual boiler |
|---|---|---|
| Steam window | Short, tails off | Continuous, never sags |
| Milk volume per go | ~120–150ml (one drink) | Up to a full 600ml pitcher |
| Brew + steam together | No — wait between | Yes — simultaneous |
| Microfoam quality ceiling | Excellent with tight technique | Excellent, more forgiving |
| Best for | One or two drinks, patient maker | Back-to-back drinks, guests |
If you make one or two milk drinks a morning and you are willing to work in sequence, a single boiler will not hold your latte art back — your milk texture will. I have poured hearts off a Gaggia Classic that I would happily serve anyone. The machine is not your limit; your first two seconds of stretch are. If you are still choosing a machine, the trade-offs run deeper than milk, and I cover them in the single boiler vs heat exchanger breakdown.
Frequently Asked Questions
Can a single-boiler machine make proper microfoam?
Yes. The limitation is steam duration, not quality. Steam a smaller volume of around 120 to 150ml, wait the full ten to fifteen seconds past the ready light, and add all your air in the first two to three seconds. The microfoam can be just as glossy as a dual boiler’s.
How much milk should I steam on a single boiler?
Steam roughly 120 to 150ml, enough for one flat white or small cappuccino, in a 350ml pitcher. The modest steam stream can heat and texture that small mass before the boiler pressure tails off. Attempting a full latte’s worth usually means the steam dies before the milk is ready.
Why does my single boiler run out of steam mid-pour?
A single boiler stores a limited amount of steam energy, so pressure builds, peaks and then falls. If it dies mid-steam you are using too much milk or started too early. Steam less milk, wait longer past the ready light, and front-load your aeration into the first two seconds of strong pressure.
Do I need to wait between steaming and pulling a shot?
Yes, on a single boiler you do. The one boiler must change between brew temperature and steam temperature, which takes time in both directions. Pull your shot first, then let it climb to steam, wait past the ready light, and steam. Use a cooling routine before brewing again if you steamed first.
Is a dual boiler worth it just for better milk?
Not for milk quality alone. A single boiler reaches the same microfoam ceiling with tighter technique. A dual boiler buys you continuous steam, larger volumes and simultaneous brew-and-steam, which matters if you make several drinks back to back or for guests. For one or two drinks a morning, technique closes the gap.
Related Guides
- The Complete Milk Steaming Guide — the full skill, start to finish
- Choosing a Steaming Pitcher Size — the right jug for small-volume steaming
- Milk Temperature by Drink Type — cut-off targets for every drink
- Your First Latte Art Patterns — what to pour once your microfoam is right
- Cleaning the Steam Wand — protect the steam power you have